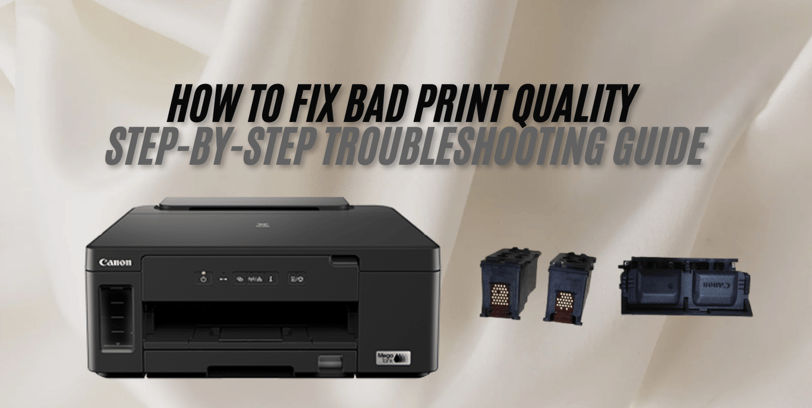
How to Fix Bad Print Quality | Step-by-Step Troubleshooting Guide
Struggling with bad prints quality? Discover practical tips and solutions to troubleshoot printing issues, clean print heads, and maintain your printer for top-quality results.
Praveen Kumar - Canon Printer Specialist
12/14/20247 min read
You’ve just printed an important document, only to find the text is faint or the colors are uneven. It’s frustrating, isn’t it? Poor print quality can derail your workflow, waste your resources, and leave you feeling helpless.
Many printer users face this issue, and the good news is that it’s often solvable. Ignoring it could mean more wasted ink, paper, and time, leading to higher expenses. Worse, it might signal a preventable problem with your printer that could escalate if left unchecked.
This blog is your step-by-step guide to addressing and resolving faint or uneven printing. We’ll cover everything from basic checks to advanced maintenance techniques, helping you restore your printer’s performance and get the crisp, clear prints you need.
1: Initial Checks
Before diving into advanced troubleshooting, let’s tackle the basics. Sometimes, the simplest steps can resolve the issue:
1. Verify the Paper Type and Settings
Paper Quality: Ensure you’re using the right type of paper for your printer. High-quality paper designed for your printer model ensures optimal ink absorption and prevents smudging.
Paper Settings: Double-check that the paper settings in your printer driver match the paper loaded in the tray. Mismatched settings can cause faint or uneven printing.
2. Inspect the Ink Levels
Low Ink Warning: Most modern printers provide an alert when ink levels are low. Even if there’s no warning, visually inspect the cartridges.
Refill or Replace: If the ink levels are low, refill the ink tanks (for ink tank printers) or replace the cartridges. Always use genuine ink to avoid compatibility issues.
3. Confirm Printer Settings
Print Quality Settings: Navigate to your printer’s settings and ensure the print quality is set to the appropriate level. A “Draft” or “Economy” setting might result in faint printing.
Color Settings: If you’re printing in color, ensure the printer isn’t set to grayscale mode unintentionally.
4. Run a Test Print
Purpose: A test print can help identify if the issue lies with specific documents or overall printer functionality.
How to: Use your printer’s built-in test print feature, often accessible via the control panel or software interface. Evaluate the output for signs of uneven or faint areas.
These initial checks often resolve the problem without requiring in-depth maintenance. If the issue persists, it’s time to move on to more detailed diagnostics and solutions.
2: Nozzle Check and Maintenance
The next step in addressing faint or uneven printing is performing a nozzle check and maintenance to identify and resolve any print head issues. Here’s how:
1. Perform a Nozzle Check
Purpose: A nozzle check ensures that all ink nozzles are functioning correctly and not clogged.
How to: Use your printer’s maintenance menu or software utility to run a nozzle check. This will print a pattern showing whether all nozzles are dispensing ink properly.
Interpret Results: Compare the printed pattern to the reference image provided in the printer manual. Missing lines or broken patterns indicate a clogged nozzle.
2. Clean the Print Head
Standard Cleaning: If the nozzle check reveals issues, initiate a standard print head cleaning using the printer’s maintenance menu. This clears minor clogs and restores ink flow.
Deep Cleaning: For persistent clogs, perform a deep cleaning. Keep in mind that deep cleaning uses more ink, so use it only when necessary.
3. Print Another Nozzle Check
After cleaning, run another nozzle check to verify the improvement. Repeat the cleaning process if issues persist, but avoid excessive cleaning as it may deplete ink levels.
4. Check for Physical Obstructions
Inspect the Print Head: If cleaning doesn’t resolve the issue, manually inspect the print head (if accessible) for dried ink or debris. Refer to your printer manual for instructions on safe handling.
Use Cleaning Solutions: For stubborn clogs, consider using a specialized print head cleaning solution. Apply it as per the product instructions and let it soak to dissolve dried ink.
5. Reinstall the Print Head (If Applicable)
In some printers, you can remove and reinstall the print head. Doing this can help reset connections and improve performance.
By performing these maintenance tasks, you can often resolve print quality issues caused by clogged or malfunctioning nozzles. If the problem persists after these steps, consider seeking professional support or replacing the print head.

3: Cleaning the Print Head
Cleaning the print head is a crucial maintenance task for resolving faint or uneven prints caused by dried ink or other debris. Here’s a detailed guide:
1. Understanding Print Head Cleaning
What It Does: Print head cleaning pushes ink through the nozzles to clear any blockages.
When to Do It: Perform this step when your prints show missing lines, streaks, or faded areas despite sufficient ink levels.
2. How to Clean the Print Head Automatically
Most printers offer an automatic cleaning feature through their maintenance menu or software utility. Follow these steps:
Access your printer’s maintenance settings.
Select "Clean Print Head" or a similar option.
Confirm the action and allow the printer to complete the cleaning cycle.
Print a test page to verify the results.
3. Manual Print Head Cleaning
If automatic cleaning doesn’t work, you might need to clean the print head manually (if your printer allows this):
Preparation: Turn off the printer and unplug it. Clean with cotton cloth.
Accessing the Print Head: Open the printer cover and carefully remove the print head as instructed in the user manual.
Cleaning Process:
Dampen the cloth with water or cleaning solution.
Gently wipe the print head to remove ink buildup or debris.
Avoid touching the nozzles directly with your fingers or a rough material.
Reinstallation: Allow the print head to dry completely before reinstalling it in the printer.
4. Preventive Measures for Keeping Print Heads Clean
Regular Use: Print regularly to prevent ink from drying in the nozzles.
Turn Off the Printer Properly: Always use the power button to turn off your printer to ensure the print head returns to its resting position, preventing drying.
Environment: Keep your printer in a cool, dry place to reduce exposure to heat and dust.
Cleaning the print head properly can significantly improve print quality. If issues persist after multiple cleaning attempts, it may be time to replace the print head or consult a technician.
4: Print Head Alignment
Print head alignment is essential for ensuring sharp and precise print results. Misalignment can cause distorted images or misaligned text, impacting the overall quality of your prints. Here’s how to align your print head effectively:
1. Why Print Head Alignment Matters
Purpose: Print head alignment ensures that the nozzles are correctly positioned, preventing overlaps, gaps, or streaks in your prints.
When to Align: Perform alignment after installing a new print head, replacing ink cartridges, or noticing misaligned lines in your prints.
2. Automatic Print Head Alignment
Many printers offer an automatic alignment feature. Follow these steps:
Access the maintenance menu via the printer’s control panel or software.
Select "Align Print Head" or a similar option.
Follow the on-screen instructions. The printer will print an alignment sheet.
Place the alignment sheet on the scanner bed as directed, and the printer will complete the alignment process automatically.
3. Manual Print Head Alignment
If automatic alignment isn’t available or effective, you can manually align the print head:
Print an Alignment Sheet: Use the printer’s settings to print an alignment sheet.
Analyze the Patterns: The alignment sheet will have multiple patterns. Identify the best-aligned pattern for each section.
Input the Results: Enter the corresponding numbers or values into the printer’s settings as instructed.
4. Tips for Accurate Alignment
Use Proper Lighting: Ensure good lighting while analyzing the alignment sheet to avoid errors.
Use Recommended Paper: Use the type of paper recommended by the printer manufacturer for the alignment process.
Proper alignment ensures optimal print quality, making your text and images crisp and professional. If alignment issues persist, it could indicate hardware problems requiring professional inspection.
5: Handling Other Print Quality Issues
Even with thorough cleaning and alignment, some print quality issues may persist due to other underlying factors. Let’s address these challenges and how to resolve them effectively.
1. Addressing Smudges and Streaks
Problem: Prints with smudges, streaks, or ink blotches can ruin the appearance of documents.
Solutions:
Check the Paper Path: Inspect the printer for any debris or leftover paper fragments that might be causing smudging.
Clean the Rollers: Use a lint-free cloth slightly dampened with distilled water to clean the paper rollers.
Use High-Quality Paper: Poor-quality or incompatible paper can lead to smudges. Always use paper recommended by the manufacturer.
2. Dealing with Misaligned or Distorted Lines
Problem: Lines in your printouts appear skewed or distorted.
Solutions:
Re-align the Print Head: Repeat the print head alignment process (automatic or manual) for precision.
Check for Hardware Issues: A warped print head or mechanical misalignment may require professional repair.
3. Tackling Faded Colors or Low Contrast
Problem: Colors look washed out, or the overall print lacks vibrancy.
Solutions:
Adjust Printer Settings: Ensure that the print quality is set to “High” or “Best” in your printer driver.
Use Genuine Ink: Third-party inks may not produce the same vibrancy as OEM inks.
Calibrate the Printer: Use the printer’s built-in calibration tools to ensure color accuracy.
4. Handling Paper Jams and Skewed Prints
Problem: Paper jams or misfeeds lead to uneven or incomplete prints.
Solutions:
Load Paper Correctly: Ensure the paper stack is aligned and not exceeding the tray’s capacity.
Inspect the Feed Mechanism: Clean and check the paper feed rollers for wear or debris.
5. Preventing Recurring Issues
Problem: Print quality problems keep coming back despite regular maintenance.
Solutions:
Keep Your Printer Clean: Schedule regular cleaning for internal components.
Store Properly: Protect your printer from dust and humidity by placing it in a controlled environment.
Perform Firmware Updates: Regularly update your printer’s firmware to fix bugs and improve performance.
Insights
Explore the latest in printer technology and tips.
Resources
Support
contact@bestprintershop.com
+918920029543
© 2024 BestPrinterShop . All rights reserved.