The Ultimate Guide to Refilling Your Ink Tank Printer: A Step-by-Step Process
Refill your ink tank printer like a pro with our easy-to-follow, expert-approved guide. Get troubleshooting tips, safety advice, and printer model recommendations for a hassle-free experience.
Praveen Kumar - Canon Printer Specialist
12/8/20246 min read

Why Refilling Your Ink Tank Printer Is Important
Ink tank printers have become an essential tool for many, offering an efficient and cost-effective way to print at home or in a small office. While purchasing new ink cartridges can get expensive, refilling your ink tank is a practical solution that saves both money and the environment.
However, refilling your ink tank printer might seem daunting at first. In this guide, we’ll walk you through each step, providing expert tips, troubleshooting advice, and safety recommendations. Whether you're a seasoned DIYer or a beginner, this guide will help you achieve a smooth and successful ink refill.
Understanding Your Ink Tank Printer
Before we dive into the refilling process, it's important to understand how ink tank printers work. Unlike traditional inkjet printers that use cartridges, ink tank printers utilize large reservoirs of ink. This makes them more efficient for high-volume printing. They also reduce waste, making them a more eco-friendly option.
How Ink Tank Printers Work:
Ink Reservoirs: Instead of cartridges, ink tank printers have large containers or reservoirs that store liquid ink.
Refillable Ink Tanks: These tanks are designed for refilling, saving you the hassle and cost of buying new cartridges.
Low Maintenance: With proper care, an ink tank printer can last much longer than conventional printers, offering better value over time.
Understanding the anatomy of your printer will make the refilling process much easier and ensure you're following the right steps.
Step 1: Gather Necessary Supplies
Before starting the refilling process, make sure you have all the required supplies on hand. Here’s what you’ll need:
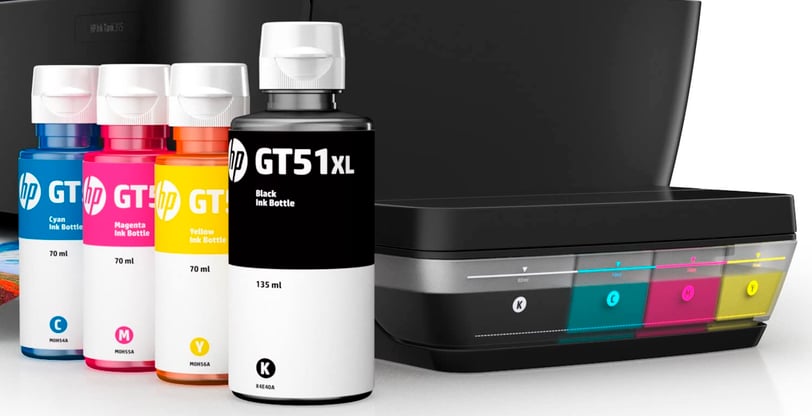
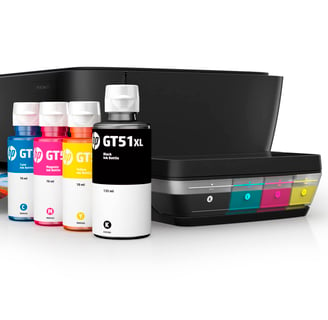
Ink Bottles (specific to your printer model)
Cleaning Cloths (for any spills or mess)
Gloves (to protect your hands from ink stains)
Paper Towels (to wipe excess ink or clean spills)
Screwdriver (if necessary for accessing the ink tank)
Tip from the Experts:
Make sure to purchase ink that is compatible with your printer model. Using the wrong type of ink can cause clogging or poor print quality. Check your printer's manual or manufacturer recommendations to ensure you’re using the right ink.
Step 2: Prepare the Printer and Workspace
Set up a clean, spacious workspace to avoid any accidental spills. Make sure your printer is powered off before you begin.
Prepare the printer by:
Unplugging it from the power source.
Lifting the printer cover to expose the ink tank.
Keeping paper towels or cleaning cloths nearby for any ink spills.
Expert Tip:
It’s a good idea to lay down some protective paper or old newspapers around your printer to catch any drips or spills.
Step 3: Access the Ink Tank
The ink tank is usually located on the side or the front of your printer. Open the ink tank compartment carefully, and you may need to remove a panel or cover to reveal the ink tanks. Refer to your printer’s manual for specific instructions on how to access the tank.
Tip for Common Models:
Canon Pixma: The ink tanks are accessible through a side panel that lifts easily.
Epson EcoTank: These printers have transparent tanks that make it easier to monitor ink levels.
Step 4: Add Ink to the Tank
Shake the Ink Bottle: Gently shake the ink bottle before opening it to ensure that the ink is evenly mixed.
Insert the Nozzle into the Ink Tank: Carefully position the ink bottle nozzle above the tank's refill opening. Ensure that it’s aligned to avoid spilling.
Refill Slowly: Begin slowly pouring the ink into the tank. Keep an eye on the ink level and stop once the tank is full.
Expert Tip:
Do not overfill the tank. Most ink tanks have a fill line or indicator that shows the maximum ink capacity. Overfilling may cause leaks or printer malfunctions.
Step 5: Close the Ink Tank and Reassemble
Once the ink tank is filled, securely close the tank’s lid and any panels or covers. Double-check to ensure that everything is properly sealed to prevent leaks.
Reassemble the Printer:
Close the printer cover.
Plug the printer back in and power it up.
The printer should automatically recognize the refilled ink tanks. If your printer has a maintenance cycle, it may go through a cleaning process after a refill. This can take a few minutes.
Step 6: Test Print and Troubleshoot
After refilling the ink, perform a test print to ensure everything is functioning correctly. Here are some troubleshooting tips if you encounter any issues:
Common Refilling Problems and Fixes:
Poor Print Quality: If the colors appear faded or blurry, the ink tank may not be seated correctly. Remove the tank, reseat it, and try again.
Ink Leakage: If you notice ink leaking from the printer, you may have overfilled the tank. Carefully remove excess ink with a cloth and recheck the tank for any seals or closures.
Air Bubbles or Gaps in Printing: Run a cleaning cycle or print a nozzle check to clear any air bubbles in the ink lines.
Expert Tip:
Use the printer’s built-in cleaning utility (found in the printer settings) to ensure optimal print quality after refilling.
Safety Tips for Refilling Ink Tanks
Refilling ink tanks can be a messy process, so it’s important to handle ink properly:
Wear Gloves: Ink can stain your hands and clothing, so wearing gloves will protect your skin.
Avoid Skin Contact: If ink comes into contact with your skin, wash it off immediately with soap and water.
Store Ink Properly: Store ink bottles in a cool, dry place to avoid drying or thickening.
Keep Ink Out of Reach of Children and Pets: Ink is not toxic, but it can be harmful if ingested.
Conclusion: Save Money with DIY Ink Tank Refilling
Refilling your ink tank printer is a great way to save money and reduce waste. By following this step-by-step guide and adhering to expert tips, you can easily refill your printer and get back to printing high-quality documents and photos.
Whether you're new to DIY printer maintenance or an experienced user, we hope this guide has been helpful. If you’re looking for more tips on printer maintenance or recommendations on compatible ink brands, check out our other expert articles.
FAQs About Refilling Ink Tank Printers
1. How often should I refill my ink tank printer?
Frequency depends on your printing volume. For regular users, refills may be needed every few months.
2. Can I use third-party ink?
While possible, third-party ink can void your warranty and compromise print quality. Stick to genuine ink for best results.
3. What happens if I overfill the tank?
Overfilling can cause leaks and damage internal components. Always monitor ink levels during refills.
4. Do all printers have ink tank sensors?
Not all models include sensors, but most modern ink tank printers do. Refer to your printer’s manual for details.
5. Can I use any brand of ink to refill my printer’s ink tank?
It is highly recommended to use ink specifically designed for your printer brand (e.g., Canon, Epson, HP) to avoid compatibility issues. Using third-party or generic ink may void your warranty and could potentially damage your printer or affect print quality.
6. How do I know when to stop filling the ink tank?
Ink tanks typically have a maximum fill line or indicator. Most printers also come with ink sensors to alert you when the tank is full. It’s important to monitor the ink level closely while refilling to avoid overfilling, which could cause leaks.
9. Can I refill ink tanks while the printer is on or should I turn it off?
For safety reasons, it is recommended to turn off the printer before refilling the ink tanks. This prevents any accidental ink spills or printer malfunctions during the process.
8. What should I do if the ink tank sensor shows low ink, but the tank is still full?
This can sometimes happen if the ink sensor is dirty or malfunctioning. Try cleaning the sensor with cloth. If the issue persists, consult your printer manual or contact customer support for troubleshooting.
7. Is it safe to leave the ink tank open for long periods while refilling?
It’s best to only open the ink tank when refilling and to close it immediately afterward. Leaving it open for an extended period can cause dust or debris to enter the tank, which could affect print quality or clog the system.
10. What should I do if ink spills during the refilling process?
If ink spills, immediately clean the affected area with a dry cloth. Be cautious when handling ink as it can stain surfaces and clothing. If ink has spilled inside the printer, use a damp cloth (not soaked) to clean the printer’s components carefully.
Insights
Explore the latest in printer technology and tips.
Resources
Support
contact@bestprintershop.com
+918920029543
© 2024 BestPrinterShop . All rights reserved.